0. Embedded Programming for My Project
For this project, I am interested in creating an instrument modification that allows me to send MIDI data accross usb from a guitar to a computer. I want to be able to use the guitar as a MIDI controller, so I can trigger samples and control effects in my DAW or MaxMSP Plugins. I would use a microcontroller like the Sparkfun Pro Micro, which is compatible with Arduino and has native USB support and enough I/O pins for the sensors and buttons I want to use.
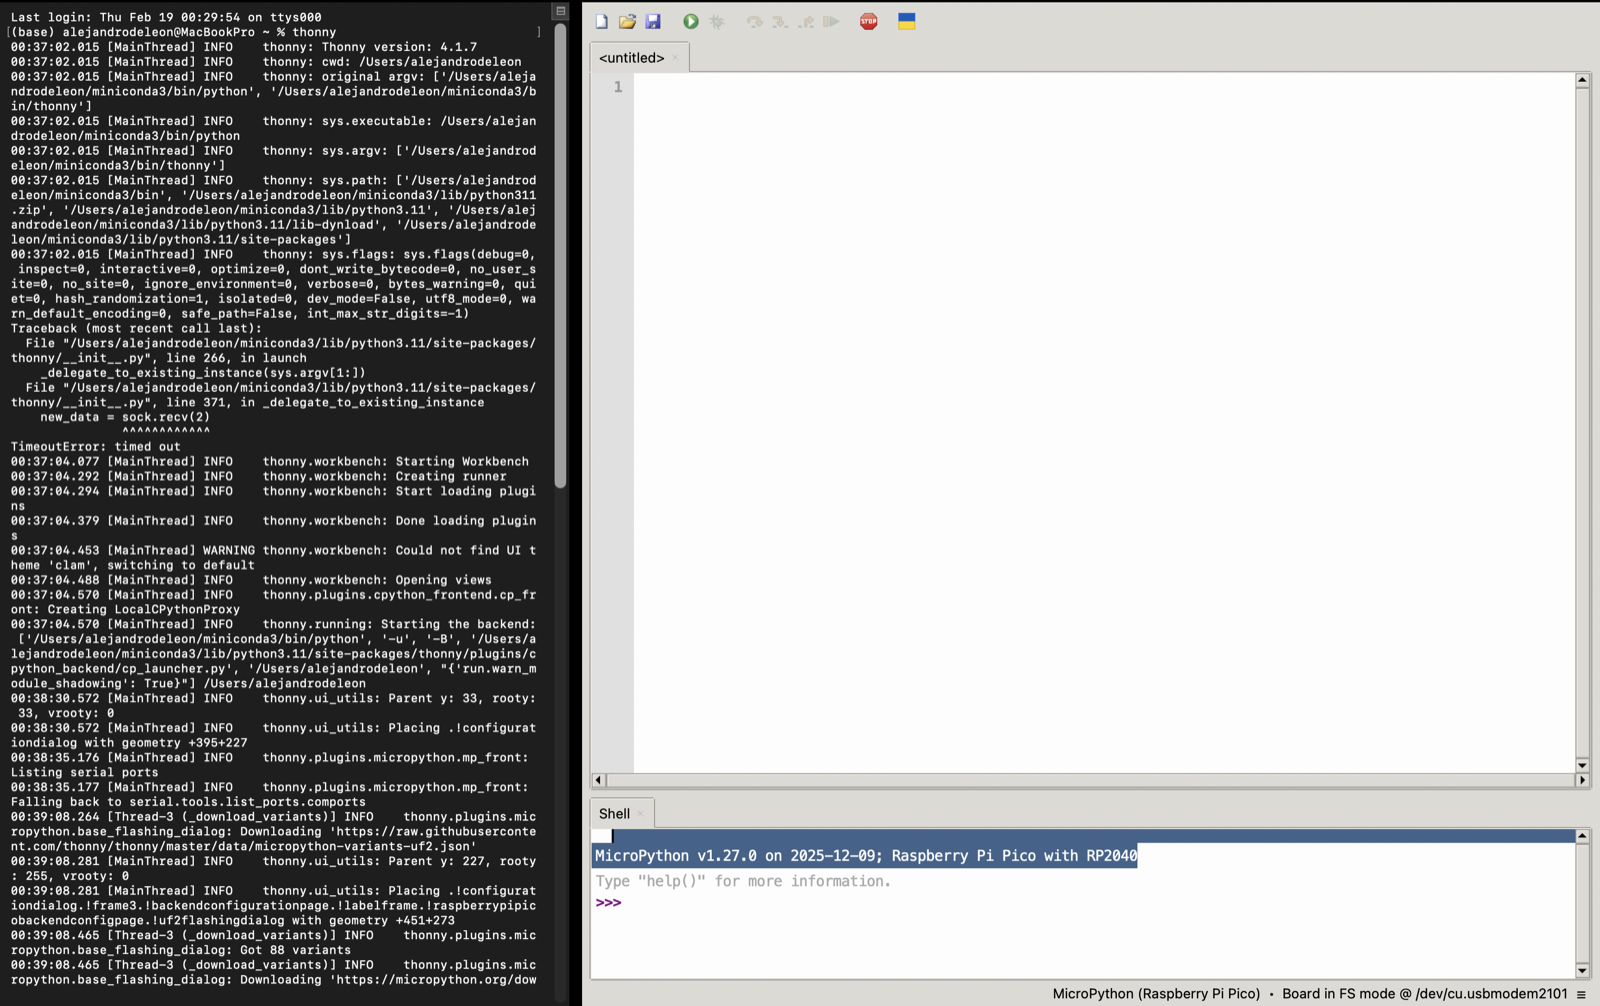
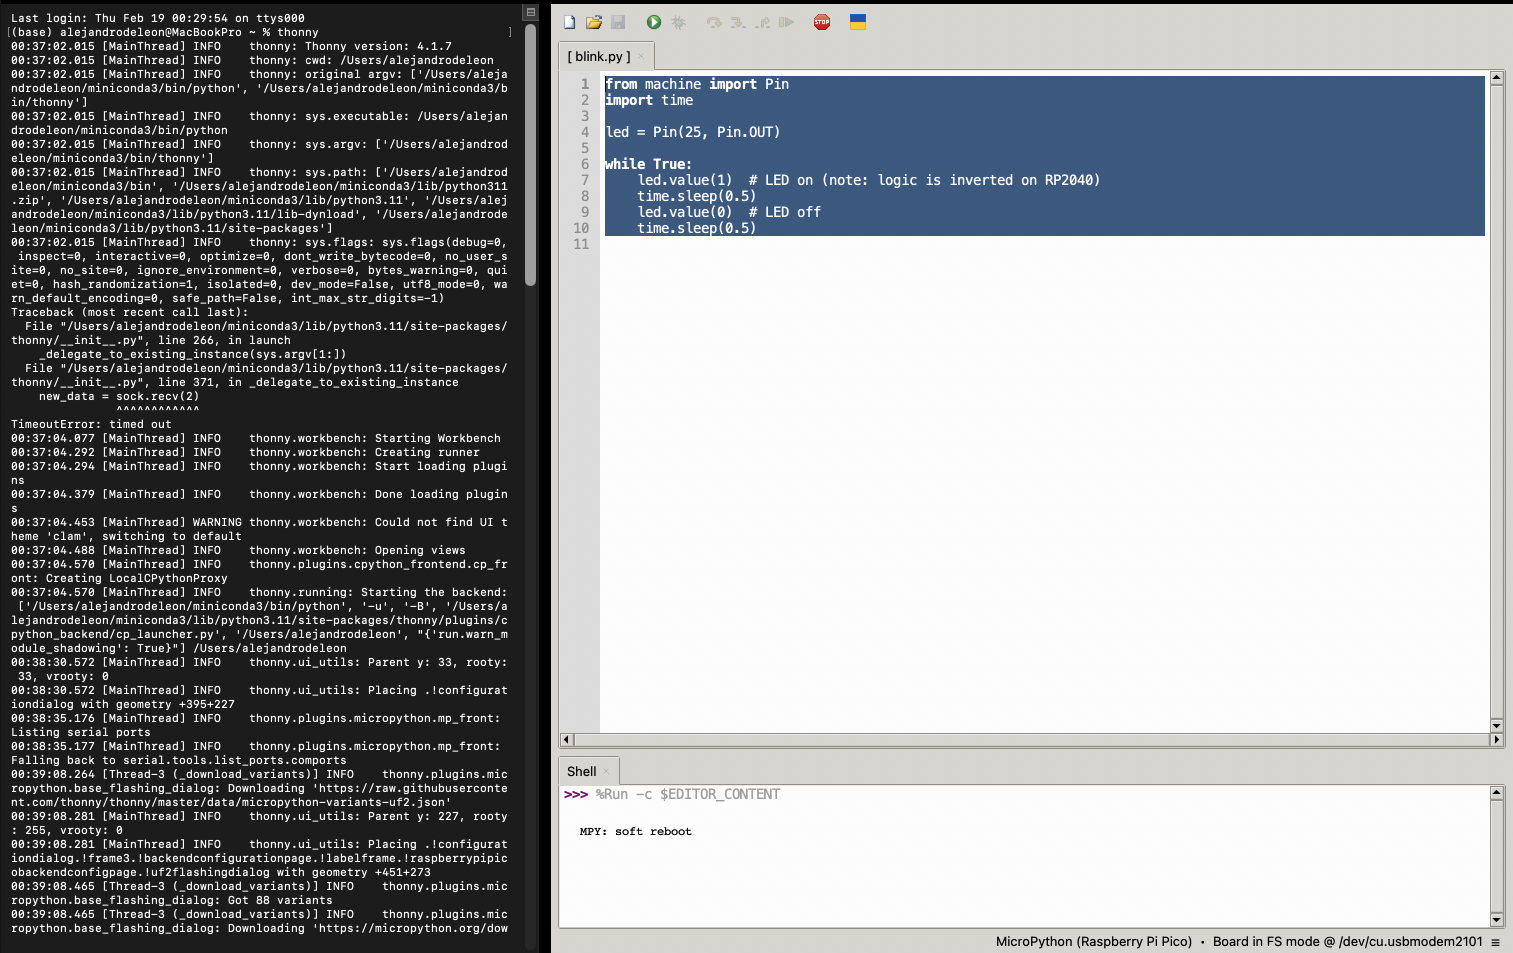
1. MicroPython Toolchain & Blinking a LED
I already had python, so I just had to install the Thonny IDE using pip and then I followed the instructions to flash the MicroPython firmware onto the XIAO SAMD21 module. I have to confess that at first I tried to do it using VSCode and the micropython extension, but I ran into some issues with finding the backend and I couldn't get it to work, so I switched to Thonny and it worked much right away for me. Once I had it set up, I was able to connect to the REPL and upload a simple script to blink an LED. It was a bit tricky at first to get everything to compile or work as for some reason in the Mac version I have some issues with clicking the buttons in the Thonny IDE but once I got the hang of it, it was pretty straightforward. And the tutorial at seeed was very good.
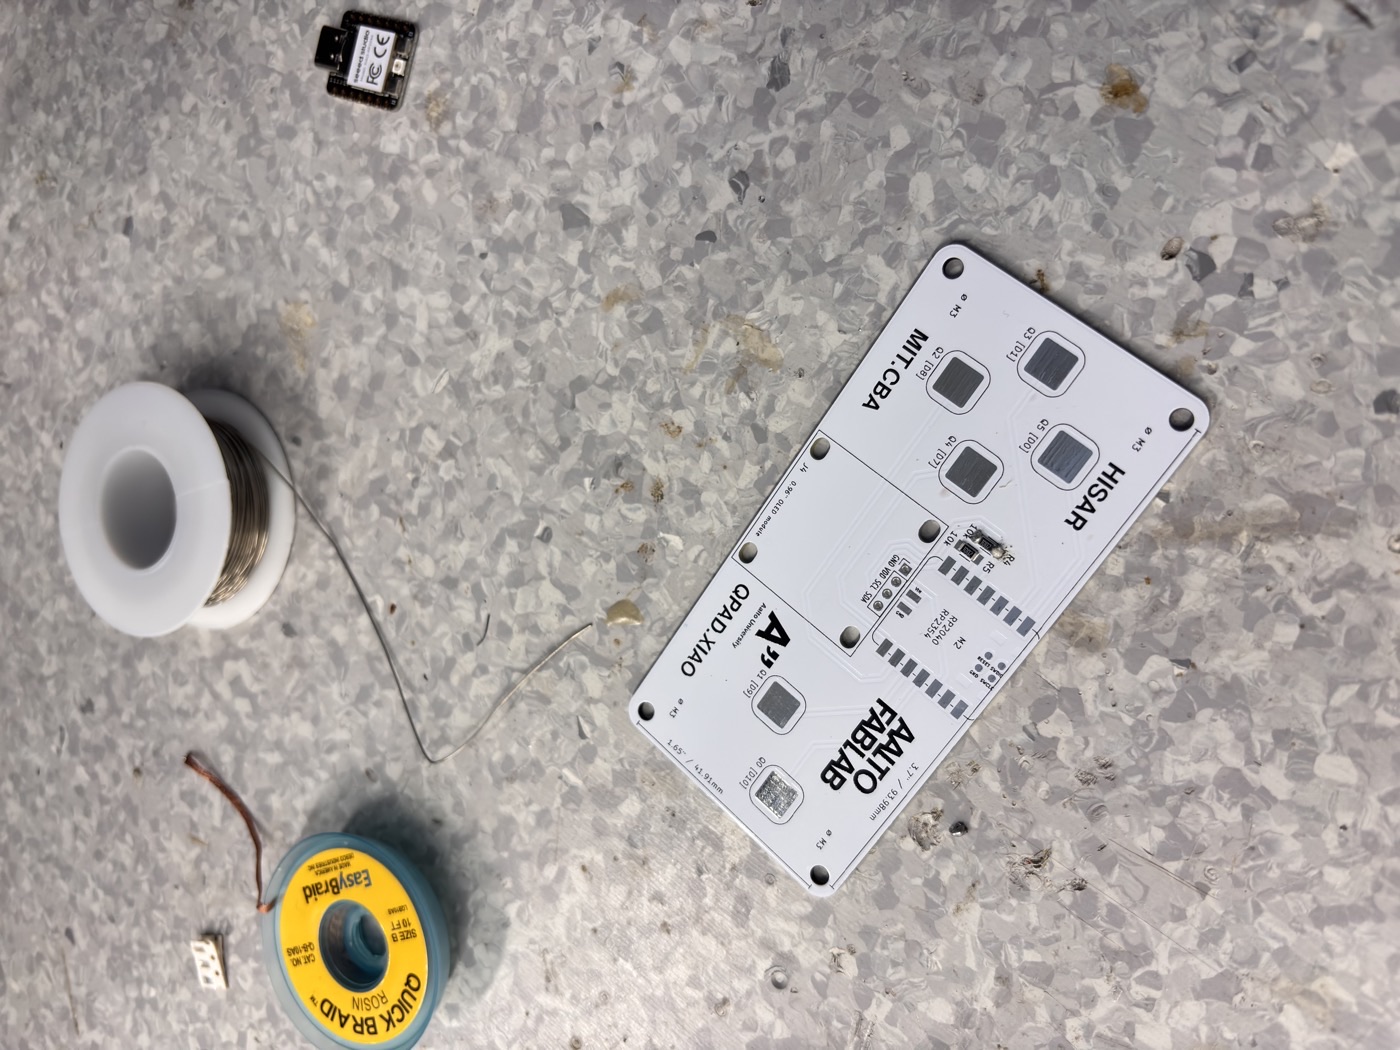
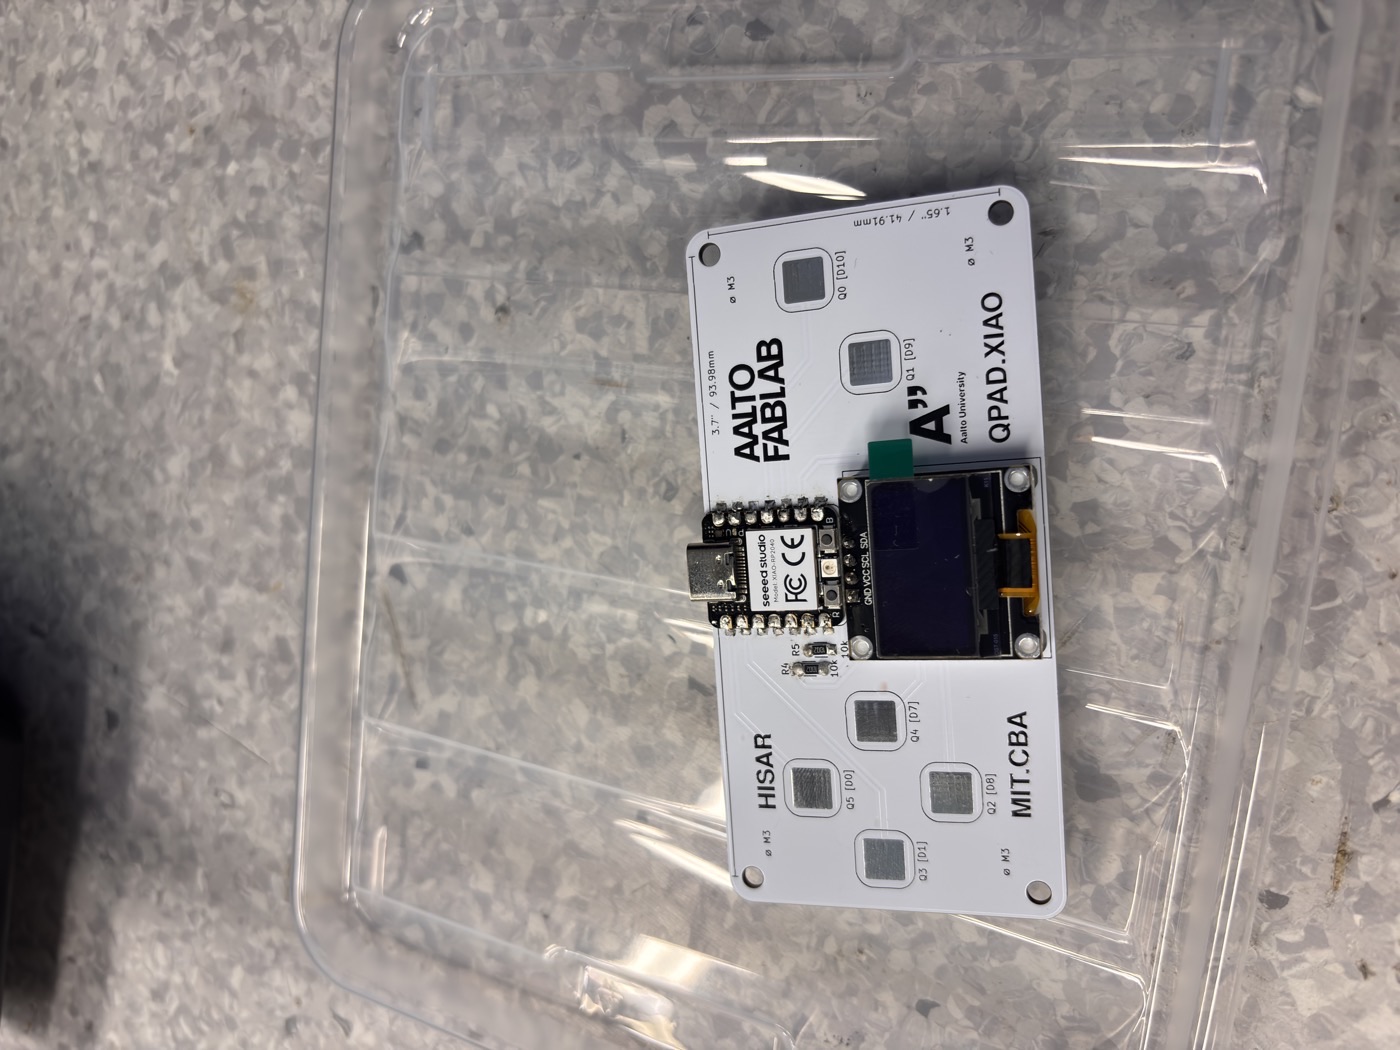
2. Assembling the QPAD Board
I soldered the components using the lab's soldering station and tools. I started by placing the components on the board according to the provided schematic and then soldered each joint carefully, from smaller SMD components to larger ones like the screen, making sure to avoid any shorts or cold joints. I took my time and double-checked each connection as I went along. After finishing, I inspected all the joints under a magnifying glass to ensure everything was properly soldered before powering it up for testing.
3. MicroPython Library Examples
So at first I tried to run the example code for the NEOPIXEL and OLED display separately, just to make sure I had the libraries set up correctly and that I could control each component individually. I realized that the issue was that I was not saving the libraries in the MCU's filesystem, so I had to use the Thonny file browser to upload the necessary library files for the NEOPIXEL and OLED display before I could run the examples successfully. Once I had the examples running, I modified the code to change the colors of the leds and display a custom message on the OLED screen, just to get a better understanding of how to control each component and how to structure the code. Python makes things really simple in my opinion.
4. Touch Input Driving OLED / NEOPIXEL
So for the final part of the assignment, I tried some LLM magic to read the libraries so I could help me code a simple game, I decided to do Snake, as it is a simple game that can be easily implemented with the components I have, the LLM spit out 120 lines of code for this game, yet I found the that controls where using the wrong positions as LEFT was DOWN and DOWN was Right, so I did some modifications manually and recompiled. Then I tried again to see if it could do Breakout, and it did it (not one-shot as I had to give more context to adjust the table speed and modify the UI), but the issue for this one was that the display is really small so rendering the game and the text overlay each other and was a bit of a mess, yet I was able to get this done in 10 minutes thanks to the LLM, so I consider this a win.
Download the source file: breakout.py
Download the source file: snake.py